The Transfer Requests feature in Aurabox allows you to request medical imaging from providers efficiently and securely. By submitting a Transfer Request, you enable healthcare providers to locate and send the correct imaging studies for your patient. The more information you provide, the easier it is for the imaging provider to fulfill your request accurately.
This documentation explains the Transfer Request process and provides helpful instructions for each section of the form.
Before you can create a Transfer Request you must have a Verified medical professional on your team able to request imaging.
In addition, you should have a process to verify the identity of Patients. If not, Patient’s can be invited to Aurabox and verify their identity using a government issued ID.
Imaging providers are usually obliged to refuse requests where the patient’s identity is not verified.
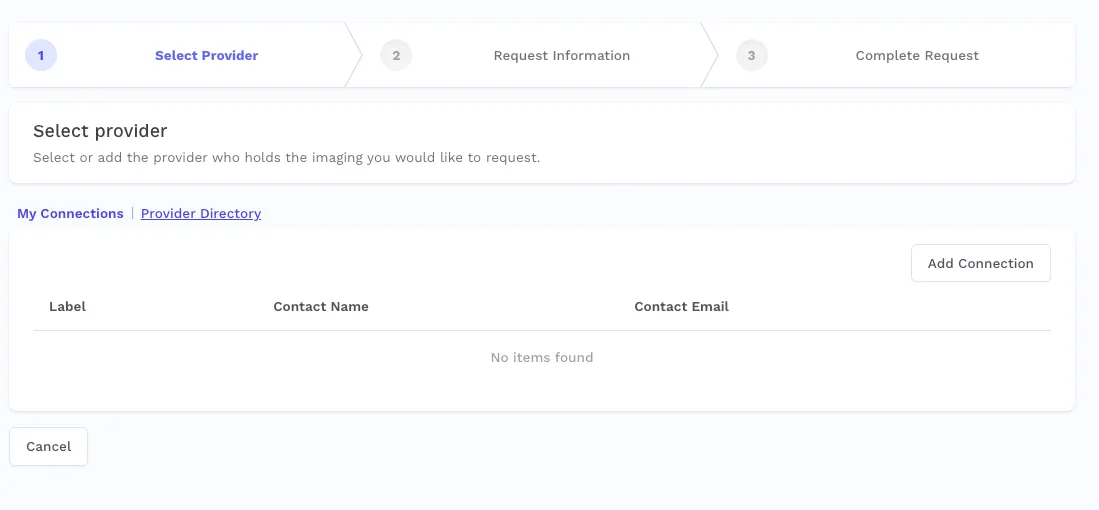
The Provider Directory lists imaging providers (including hospitals) who have integrated with Aurabox. These providers have been verified by Aurabox and are able to receive Transfer Requests.
Depending on the Provider, they may have varying levels of support for Transfer Requests.
If the provider is not listed in the Provider Directory (or the Directory is not available or does not cover your region), you can create a custom Connection. Custom Connections allow you to request imaging from providers who have not integrated with Aurabox, by sending them a special request they can fulfill via email.
You should generally contact the provider before sending them a request via Aurabox and agree to use Aurabox for the transfer.
When you add a Connection, this Connection is only visible to your team.
This section helps the imaging provider identify the correct patient and confirm their details before releasing any data.
Patient Name: Ensure that the patient’s full name and Date of Birth is entered correctly. This information is vital for locating their medical records.
Status: If the patient’s identity is unverified, providers may be unable to fulfill the request. To improve your chances of success, return to the patient’s page and complete the verification process before proceeding.
Patient Identifier (Optional): If known, include the patient’s identifier used by the imaging provider. This can often be found on past imaging reports and will help the provider locate the correct records faster.
Provide details about the specific study or imaging you are requesting. This section is critical to helping the provider locate the correct study.
Description (Required): Enter a short description of the imaging study, e.g., “Abdomen and Pelvis CT scan.” Be as specific as possible.
Date of Study (Optional): If you know the date when the imaging was performed, enter it here. If the date is uncertain, provide any approximate details in the additional notes.
Modality: Select the primary type of imaging performed (e.g., CT, MRI, X-ray) if known. This information can narrow down the search for the correct study.
Accession Number (Optional): This unique number often appears on imaging reports and can help the provider locate the exact study.
Other Information Requested: If you are requesting additional imaging or other data, specify it here (e.g., “all available imaging” or “imaging reports”).
The reason for your request is important for compliance and assisting the provider in completing your request accurately.
Reason for Request (Required): Clearly state why you are requesting this imaging. For example, “This patient is being treated or reviewed by our organisation.” This helps the provider understand the context of your request.
Ensure that you have obtained the appropriate consents before requesting medical imaging. These options are important for legal and privacy compliance.
Consents (Required): Choose the correct consent option from the list, such as:
Implicit primary use consent
General written consent
Specific written consent for Aurabox
Verbal consent from the patient
Explicit consent obtained directly by Aurabox
If no consent has been obtained, you should not proceed with the request until the necessary consents are in place.
If the patient is being treated by your organisation, then your request probably falls under a “Implicit primary use consent” consent category, and probably does not require additional consents. However, you should provide all available Consent categories.
All other uses are secondary, and generally require explicit consent. Primary Use is disabled in this circumstance.
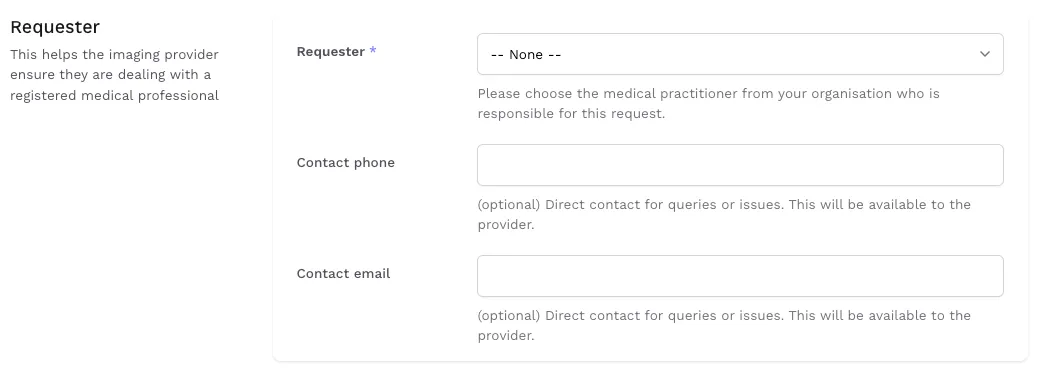
This section identifies the medical professional responsible for the request and provides the provider with a point of contact.
Generally speaking, only verified medical practioners can authorise a request for imaging. If your organisation has no verified medical practioners, you can invite them to Aurabox and complete the verification process.
Requester (Required): Select the name of the medical practitioner responsible for the request.
Contact Phone and Email (Optional): Provide direct contact details in case the provider needs clarification or has any issues fulfilling the request.
Any additional information that could assist the provider in fulfilling your request accurately should be entered here.
Additional Details (Optional): Use this space to provide any further information, such as special instructions or contextual details that may help the provider locate the correct imaging.
These options allow you to specify how you would like the imaging to be delivered.
Required By: If there is a deadline for receiving the imaging, enter the required date here.
Urgent: Mark this option if the request is urgent and needs to be prioritised by the provider.
Send to PACS: If your organisation has an existing forwarding relationship with the provider, you can select this option to have the imaging sent directly to your PACS.
Verify Patient Identity: To avoid delays, make sure the patient’s identity is verified before submitting the request.
Be Specific: Provide as much detail as possible about the study, including description, modality, and accession number, to help the provider quickly locate the correct imaging.
Ensure Consent: Always confirm that you have obtained the necessary consents before requesting medical imaging. This is critical for legal and privacy compliance.
Use Fulfilment Options Wisely: If the imaging is needed urgently or should be sent to a specific PACS, be sure to mark these options accordingly.
By following these steps, you can ensure that your Transfer Requests are processed efficiently and that you receive the correct imaging in a timely manner.